

How To Stream With An Animation Character On Twitch
If you lot want to spice upwards your alive stream on platforms such as Facebook and Twitch, why non testify upwardly as a cartoon? You will certainly capture some attention this way.
Using Adobe Character Animator, forth with a few additional resources, you lot can brand it happen. Better yet, you don't fifty-fifty demand to be a professional animator. Here'southward how to go started.
i. Selecting Your Boob
Earlier yous can appear as a cartoon on your alive stream, there are a few things to practice. Starting time, you must import the puppet yous wish to utilise and place it on your Timeline.
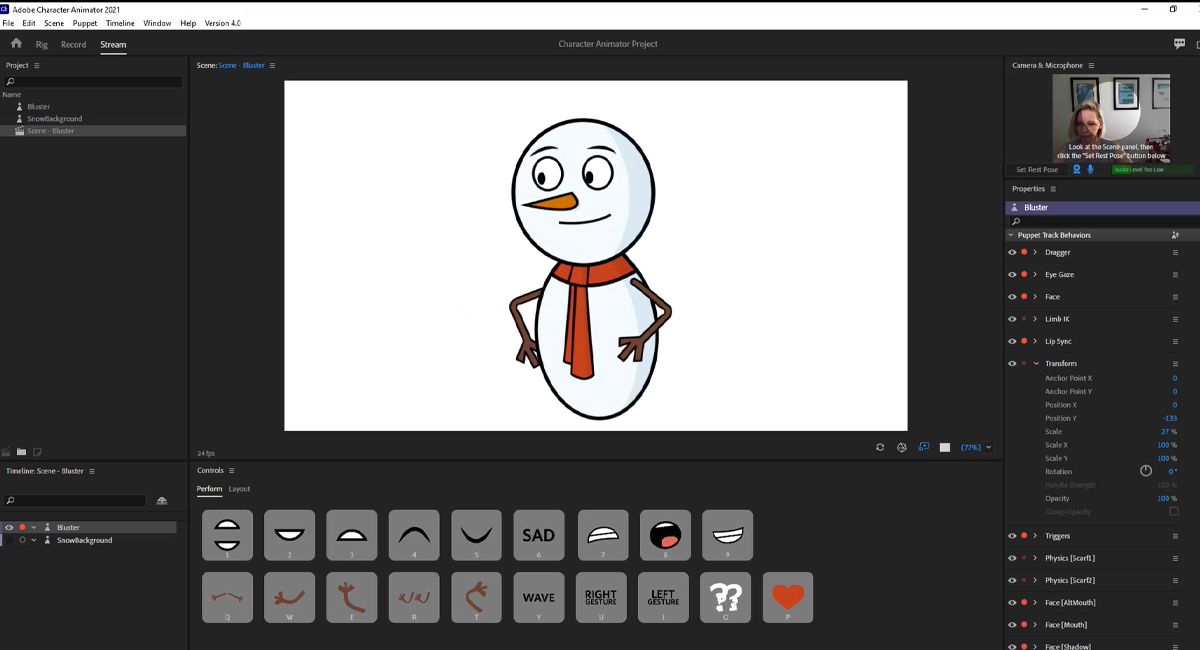
When selecting your puppet, make sure it has unproblematic controls and has a diverse selection of expressions. A great instance boob to utilise is Adobe's gratis boob, Bluster.
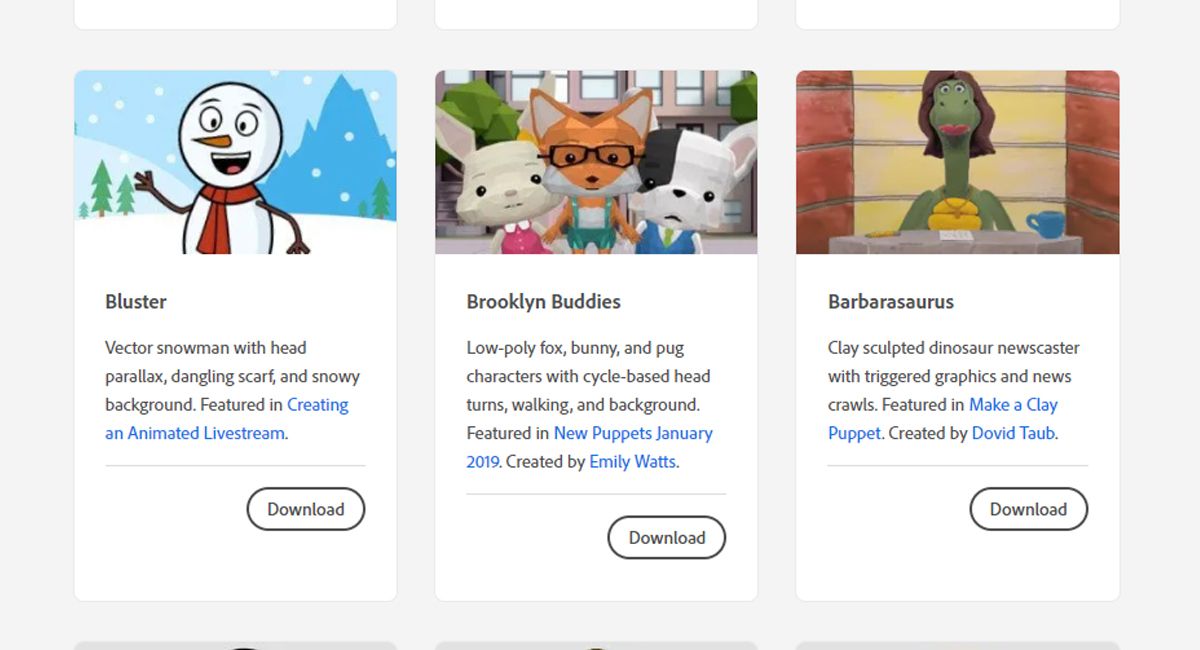
Yous tin use whatever puppet you wish. Even so, puppets with a large number of trigger expressions with easy and clear activations will allow yous to create a rich feel for your viewers. Information technology will also make it much easier for you to actuate each expression.
To bank check the bachelor triggers for your puppet, switch to Stream Mode in Character Animator, and review the options available in the Perform console. Our example boob, Bluster, has xix trigger options, allowing y'all to animate your puppet easily.
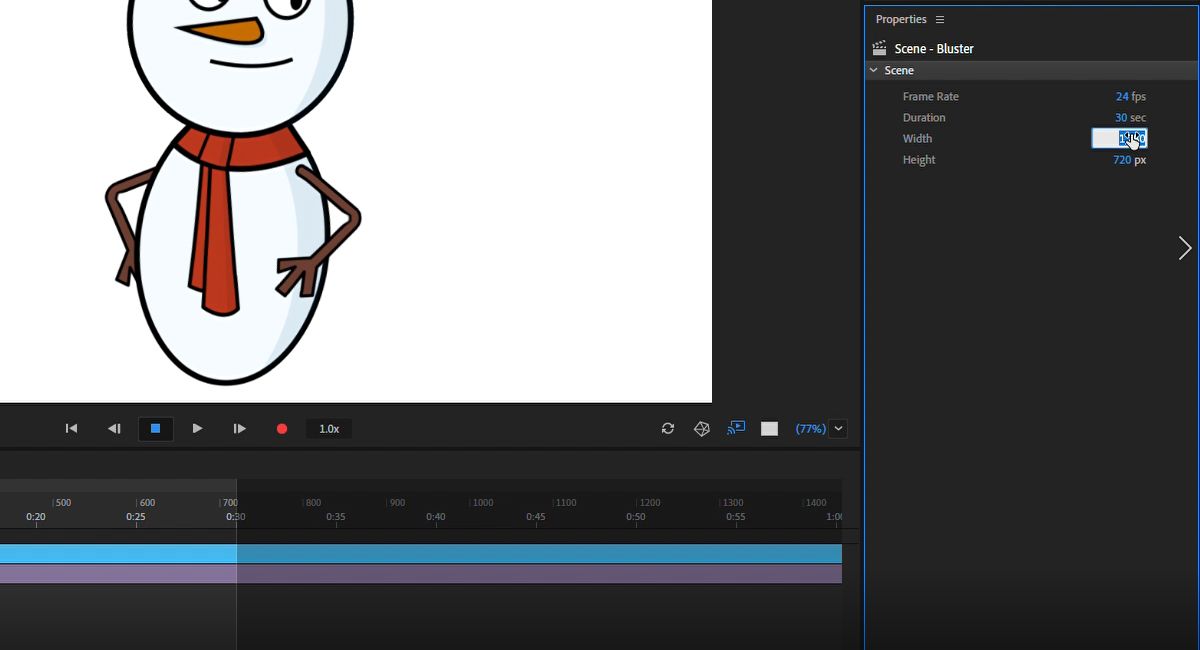
2. Set Your Scene Size
Once you lot have selected your boob and added information technology to your Timeline, you will want to brand sure the scene size is optimized for your live stream. The recommended size is 1280x720px.
To make this adjustment follow the steps beneath:
- Select your Scene from the Name window.
- In the Properties panel, change the dimensions to the recommended 1280x720px.
To enable Graphic symbol Animator to stream live, y'all will require ii things in improver to Character Animator and access to your alive stream platform. This includes a streaming software, likewise as a plugin to send your scene to the streaming software.
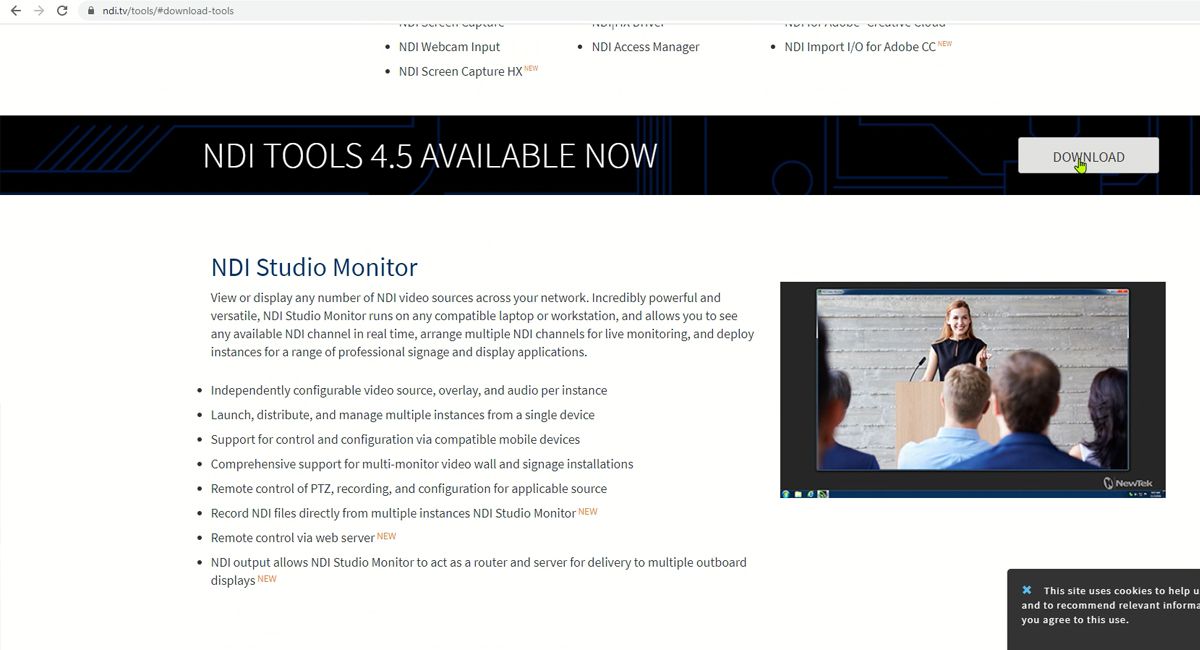
iii. Installing the NDI Plugin
For this step, you lot'll need to use Newtek'due south Network Device Interface (NDI) plugin. To download and install the NDI plugin, follow the steps below.
- Download the NDI plugin.
- Extract and install the plugin.
- Y'all will demand to ensure that you lot select theAdobe CC and Studio Monitor options during installation.

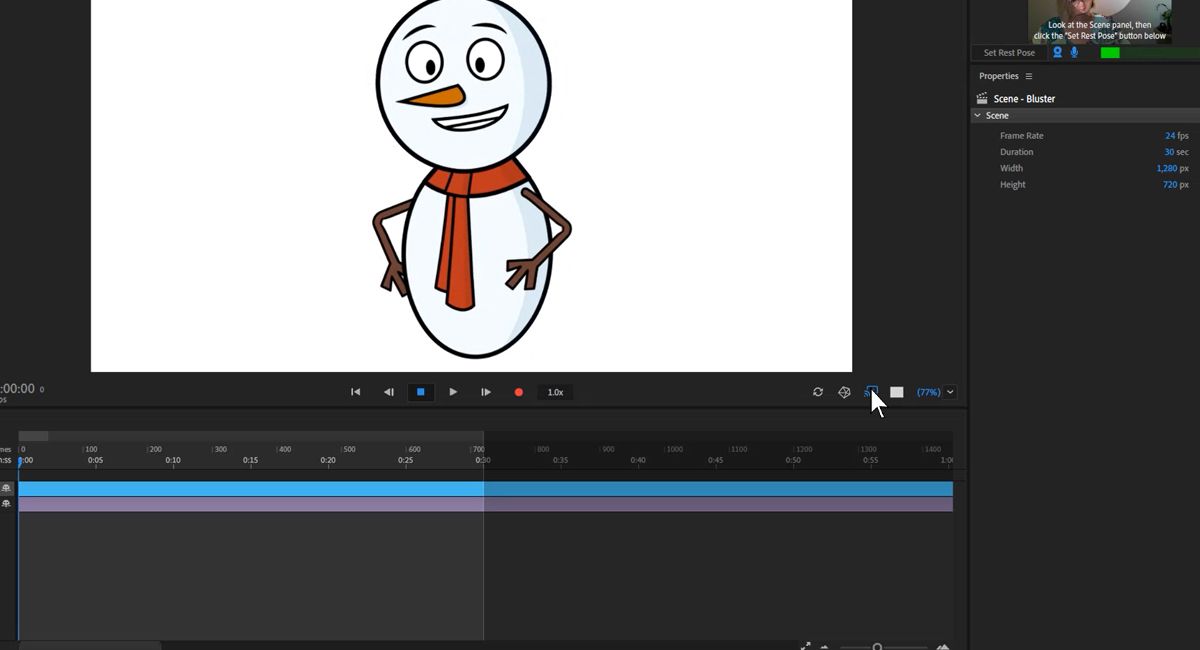
- Now, you lot'll need to ensure that the plugin is now enabled in Character Animator. To practise this, head to Character Animator.
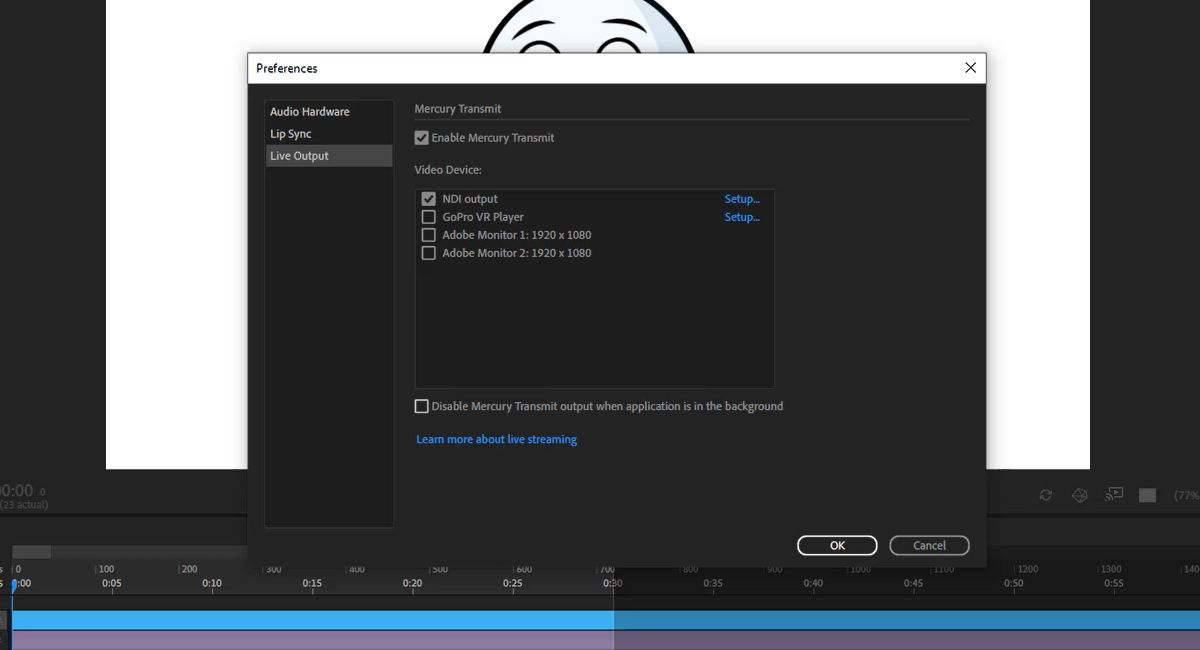
- From here, hold downwardly Ctrl (Windows) or Cmd (Mac), and and then select the Stream Live icon to the lesser correct of your Scene Panel. This will open your Alive Output Preferences.
- In the Preference window, ensure that the boxes forEnable Mercury Transmit andNDI Output are checked. At the bottom of the window, uncheckDisable Mercury Transmit output when the application is in the background.
- Select OK.
- Open the NDI Studio Monitor plugin that you only installed.
- Select the Menu icon to the superlative left corner of the screen.
- Select your estimator name from the carte, and chooseAdobe Character Animator.
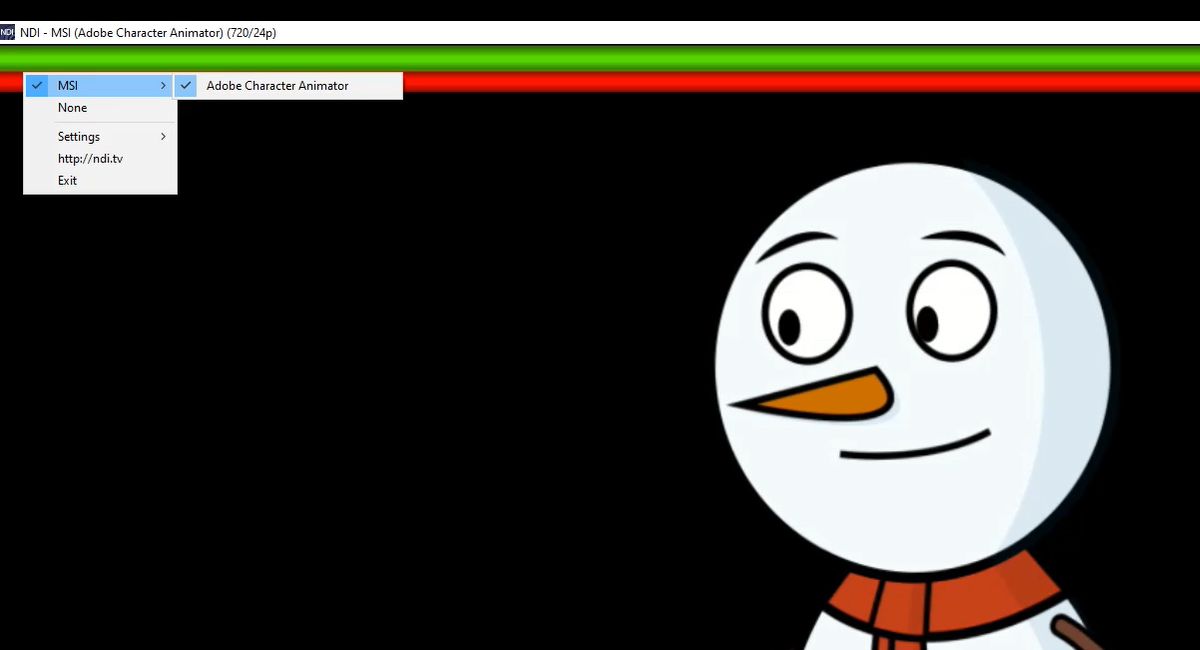
Y'all should now see your Puppet in the NDI Studio Monitor.
four. Installing the Streaming Software
There are many options on the market for streaming software. In this article, OBS Studio will be used.
OBS Studio is a free and open-source program that's compatible with Character Animator, notwithstanding, it does crave an extra plugin to make OBS and NDI work well together.
To download and install OBS Studio and the required plugin, follow the steps below.
- Download and install OBS Studio using the default recommendations.
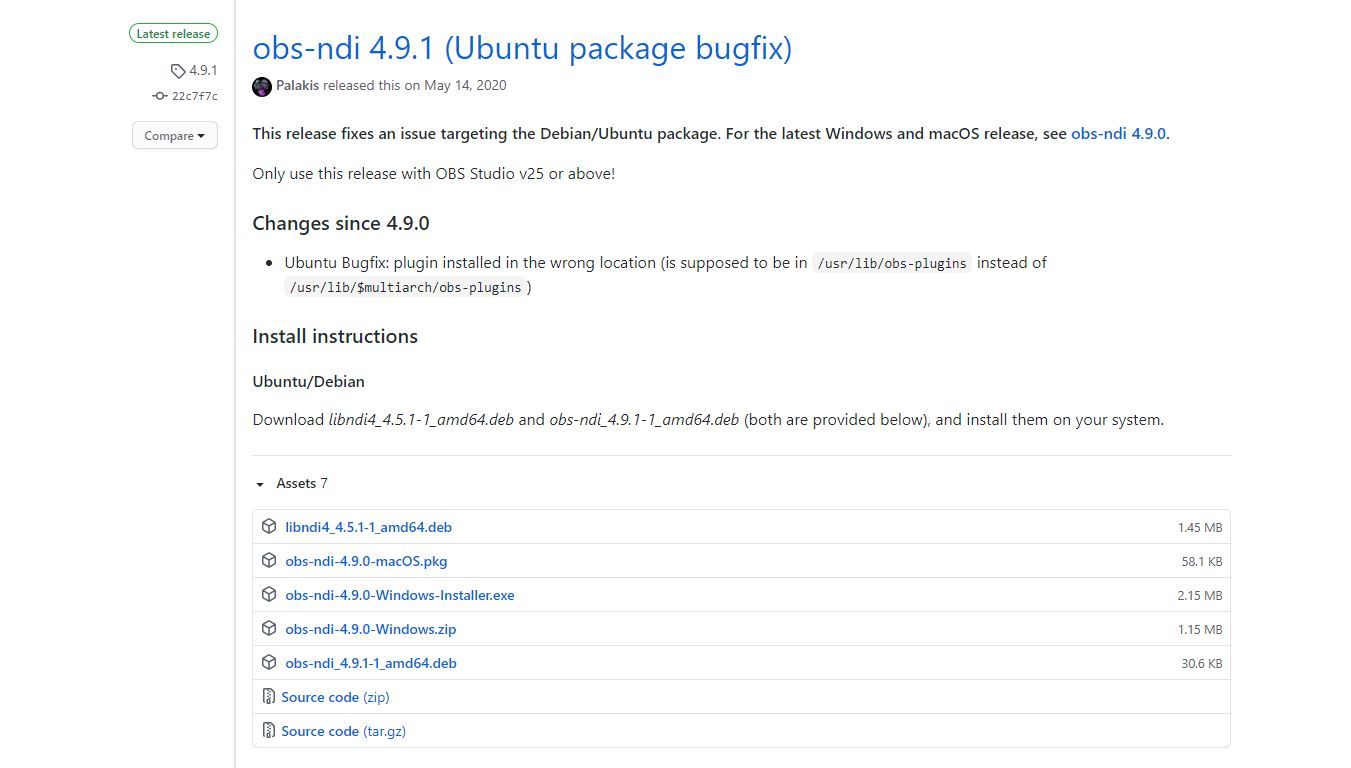
- Now, yous will need to download and install the OBS-NDI plugin from GitHub. When downloading this, you'll want to download the latest version listed for your operating organization.
- Afterwards that, open OBS Studio.
- Select the plus (+) button under Sources.
- Select NDI Source from the list that appears.
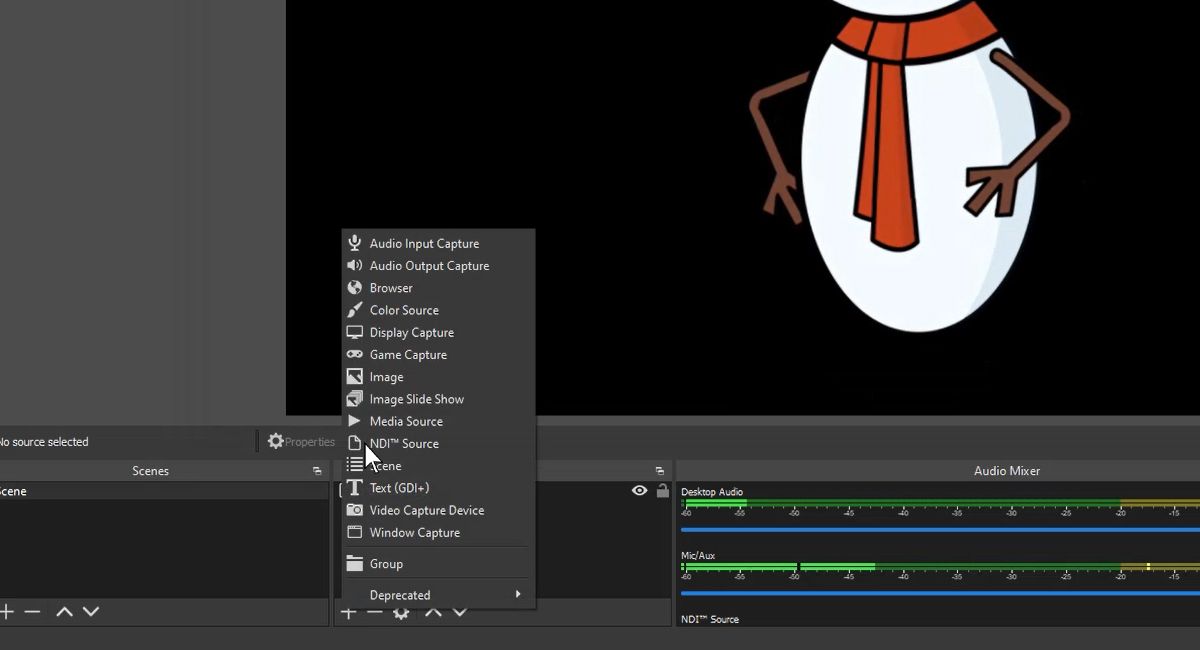
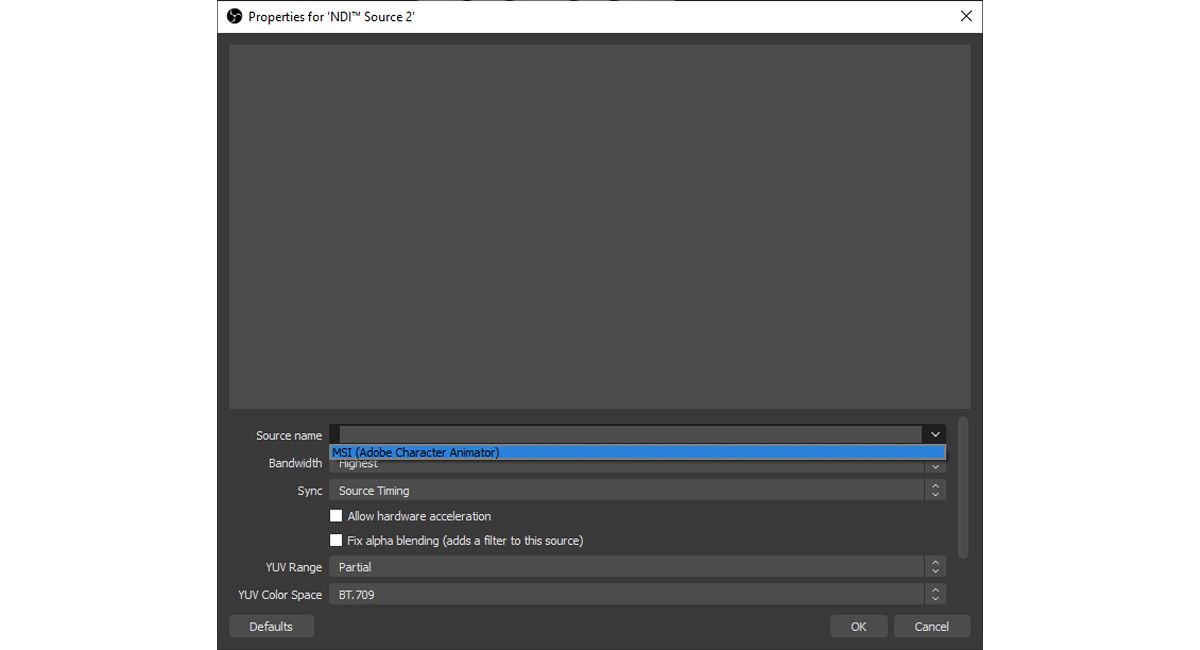
- Select OK in the popup window.
- In the Properties for NDI Source window that appears, open the Source Name dropdown list and select your figurer name source.
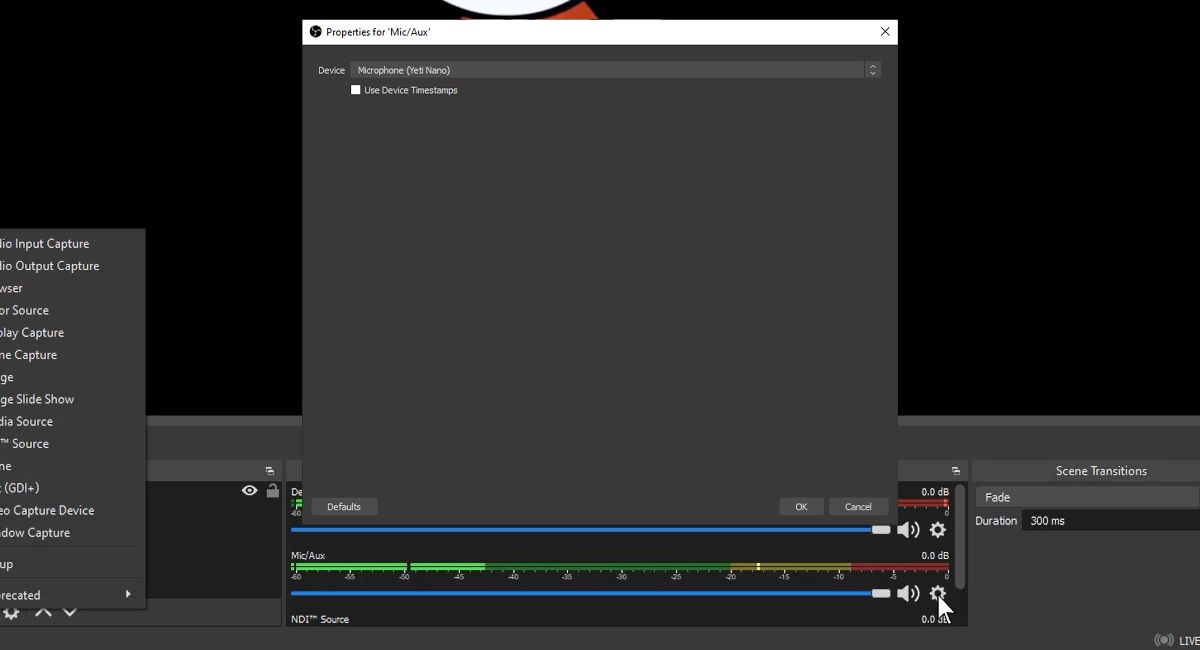
- Yous will also desire to ensure your mic is working in OBS Studio. You can practise so by selecting the gear icon adjacent to Mic/Aux in the Audio Mixer panel.
- Now, selectBackdrop.
- Select the microphone you wish to use from the Device dropdown list and select OK.
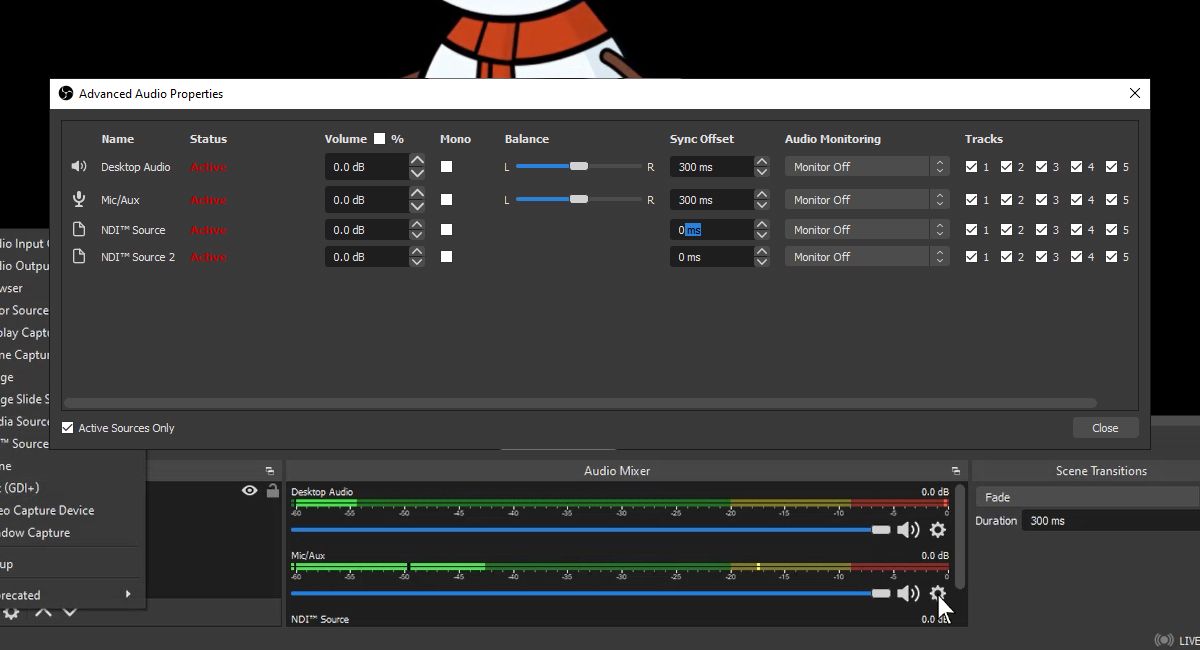
- To ensure that the audio and puppet movements are synchronized, yous will want to in one case again select the gear icon next to Mic/Aux in the Audio Mixer console. Then, selectAdvanced Sound Properties.
- Now, change the values in Sync Offset. The recommended setting is 300ms, but you may wish to experiment with this offset to ensure that it works with your system.
- To test your settings, hit Record in OBS studio to make a local copy on your computer. You can then evaluate if the starting time needs to be more than or less for your arrangement.
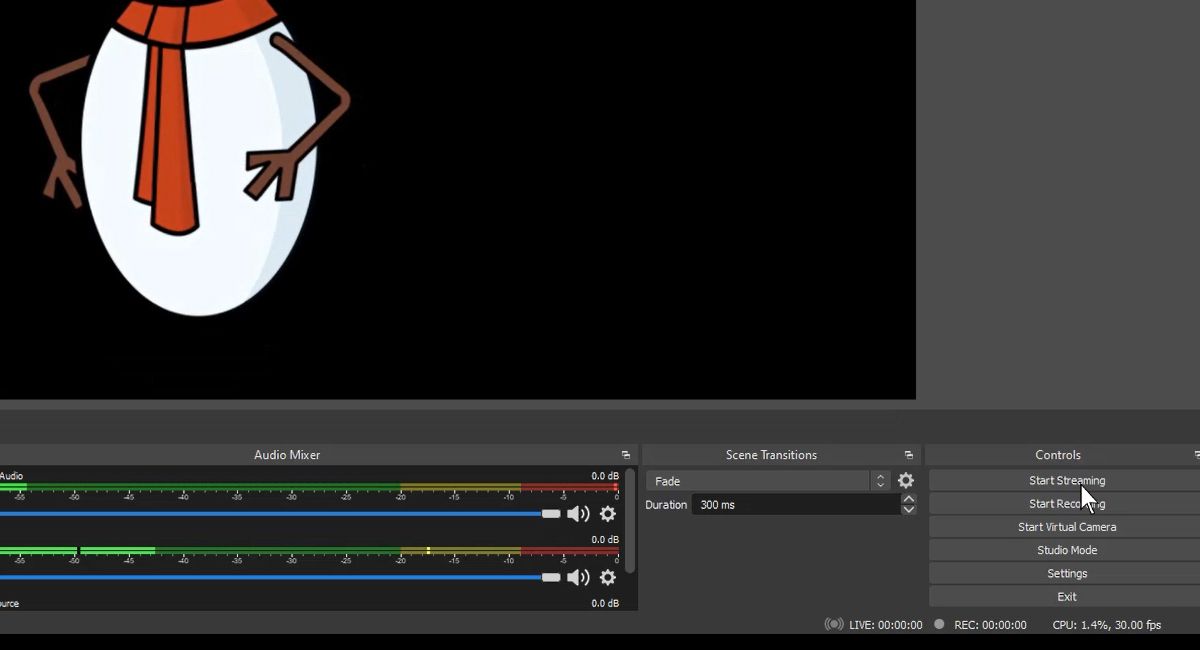
Yous should now see your puppet in OBS Studio. Only a few more steps until y'all are set up to go live!
v. Streaming Alive
Now that everything is set upwards and configured, you will need to decide which platform you want to stream alive to. For this article, Facebook Live is the selected platform.
To connect your puppet Facebook Live, follow the steps below.
- Ensure that Character Animator is open in Stream Fashion. If it isn't, clickStreaming from the Modes carte du jour.
- Review the triggers available for your puppet in thePerform panel. You lot will want to use these during your live circulate to bring your puppet to life.
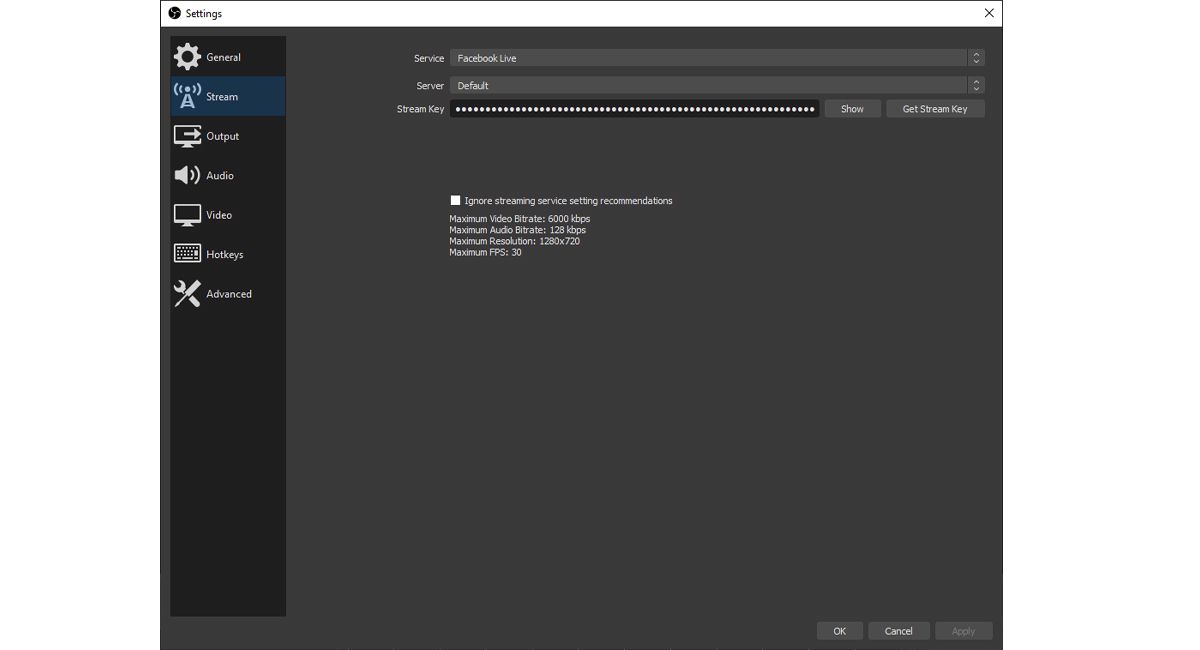
- In OBS Studio, select File > Settings.
- Select Stream from the menu on the left.
- Select the Facebook Alive choice from the Service dropdown.

- Now, open Facebook and select Live Video from your Condition Update options.
- SelectApply Stream Cardinal, and copy the lawmaking provided in the Stream Key box.
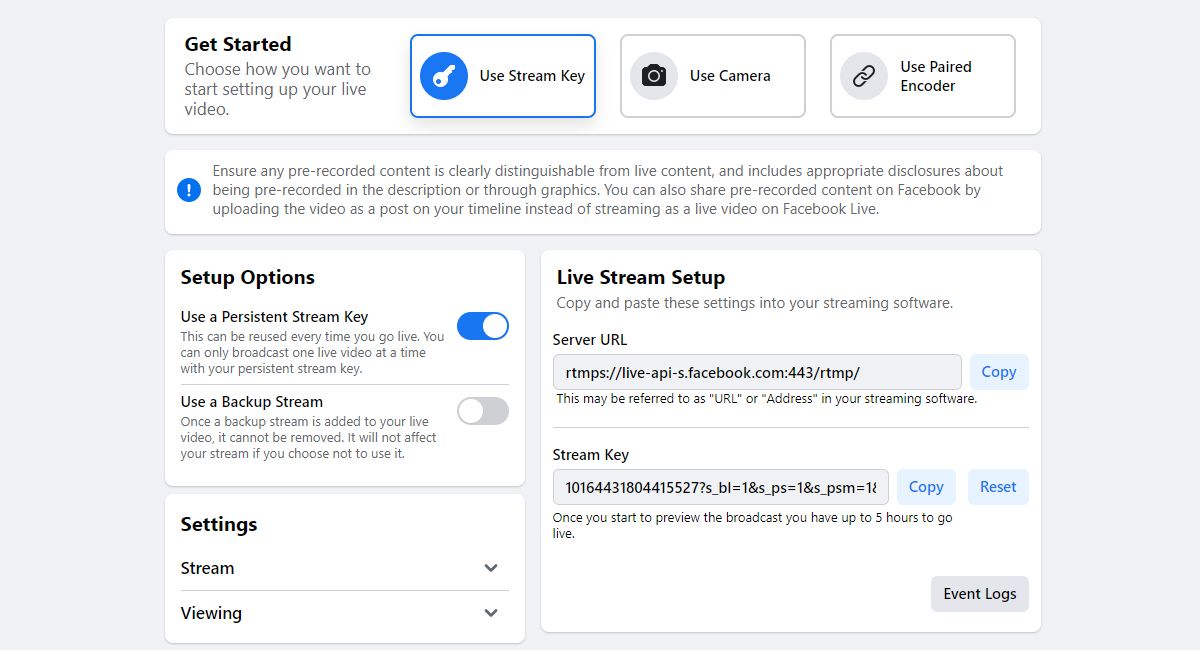
- Return to OBS Studio, and enter the Stream Key into the box provided.
- You're set to go live! Just select Start Streaming in the OBS Studio Controls Panel to go live on Facebook.
There are a lot of other platforms you can broadcast alive to such as Twitch and YouTube. Each platform will store its Stream Key in a different location, simply the process of going live will be the aforementioned as the steps in a higher place.
Many Options to Go Creative During Live Streams
Now that you lot have created a simple live stream with your graphic symbol, it's fourth dimension to get creative! Character Animator allows yous to add together a background, boosted expressions, and movements, making it like shooting fish in a barrel to customize your puppet further.
Source: https://www.makeuseof.com/how-to-live-stream-adobe-character-animator/
Posted by: rainescouse1972.blogspot.com
0 Response to "How To Stream With An Animation Character On Twitch"
Post a Comment